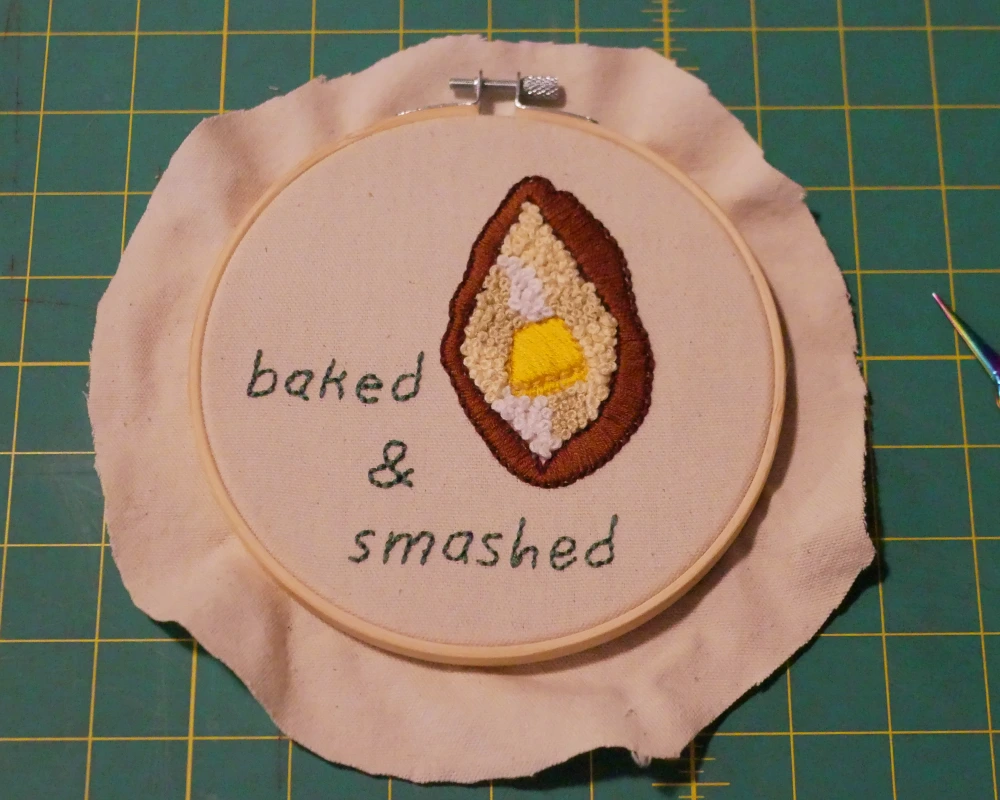
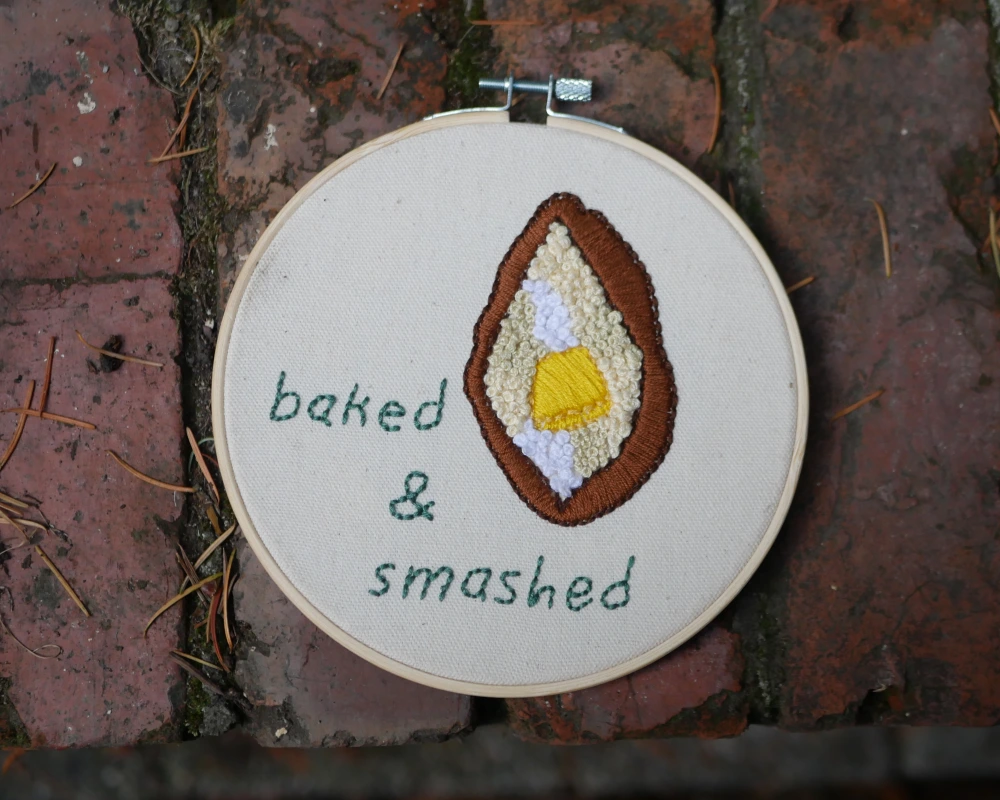
Baked and Smashed – FREE Embroidery Pattern for Beginners
Celebrate your inner potato (and nothing else…) with the FREE November embroidery pattern from The Cozy Cuttlefish.
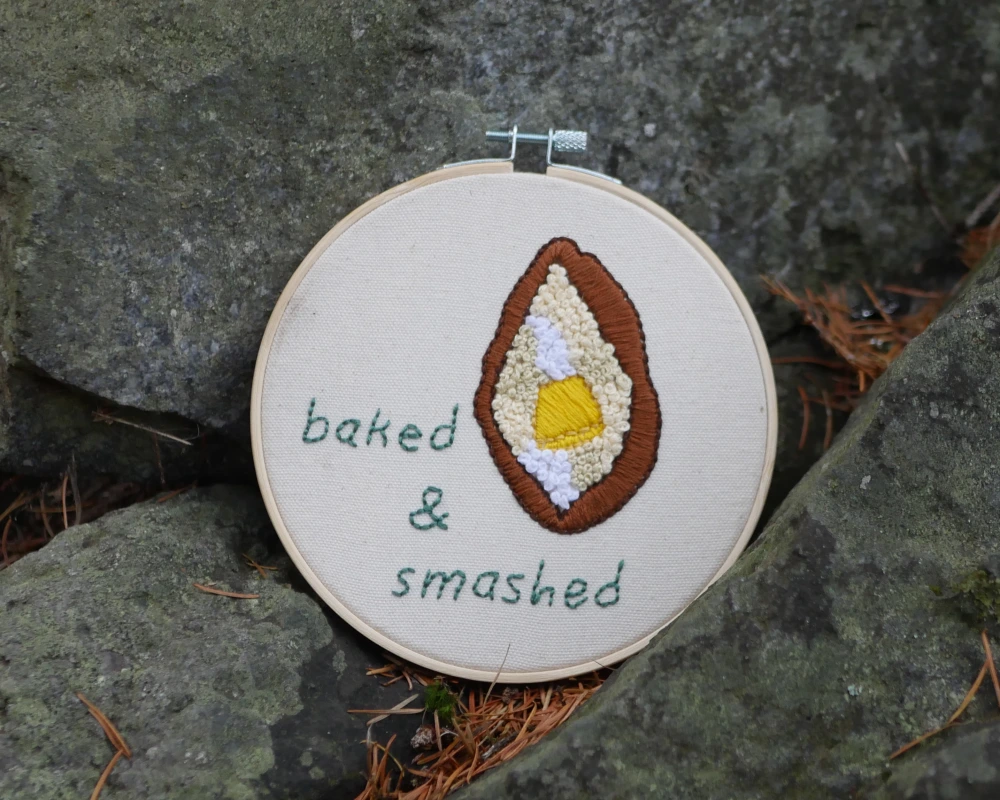
For many people, potatoes are the perfect addition to any meal. There are so many ways to prepare them, and they go with just about any cuisine. And that’s all that is going on here. Celebrating a food staple, and how they can be baked… or smashed….
If you want to interpret this pattern any other way, I will deny everything!
This embroidery pattern might be a bit of grown up word play, but it is also the perfect pattern for any embroidery beginner. You only need to learn three foundational stitches, and you’ll get lots of practice with each one.
If you are in the Tacoma, Washington area, be sure to check out my events page to see when the next embroidery class will be. As always, they are held at Mattice Beauty Supply. This is an amazing place to shop for any hair needs. Without Mattice, these fun embroidery patterns wouldn’t exist, so be sure to tell her, “thank you,” when you visit her store!
What You’ll Need
- A 6-inch embroidery hoop to hold your fabric
- A 9×9 inch square of cream woven fabric
- Embroidery needles
- Scissors
- Marking tool to draw your design
- About 8 colors of embroidery floss
- Optional: A bit of thread
- Optional: A 6-inch circle of felt
What Colors to Use
I always encourage people to use whatever colors you have or like in their embroidery. But, if you want to use the same colors as me, here are my suggestions:
- DMC 3821 – Dark Yellow
- DMC 444 – Yellow
- DMC 938 – Dark Brown
- DMC 3823/3047/BLANC – Mix of creams and yellows
- DMC 433 – Brown
- DMC 501 – Teal
Embroidery Stitches in This Pattern
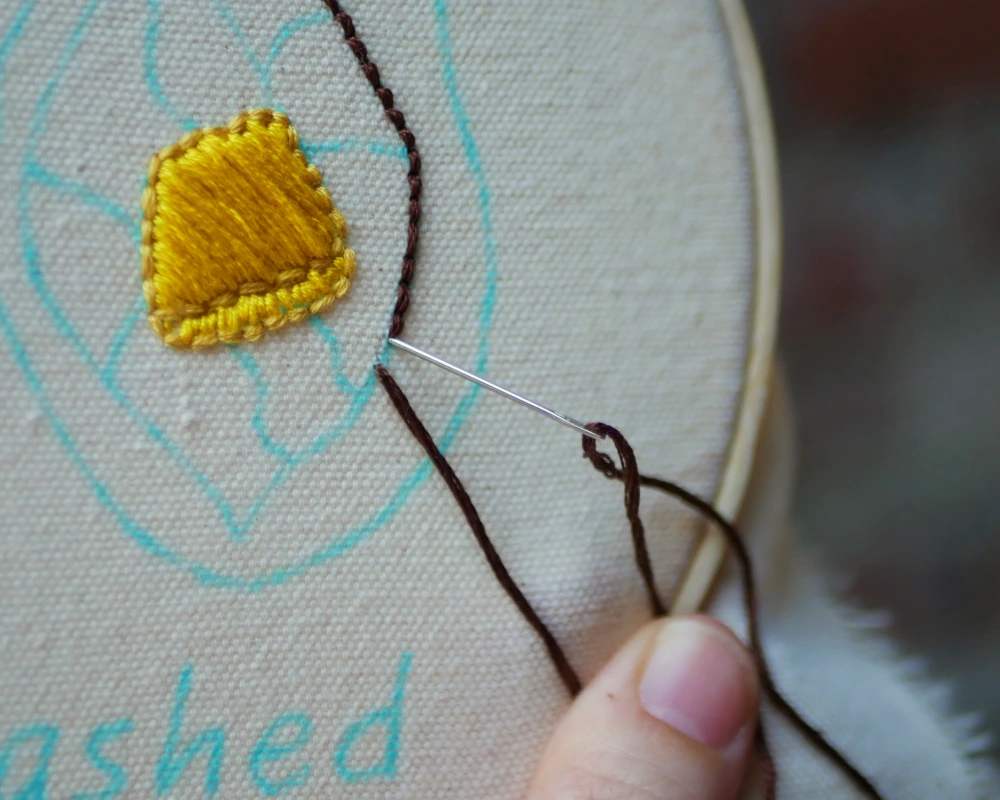
Back Stitch

The first stitch in this pattern is the back stitch. This is a basic stitch for embroidery, and for hand sewing in general.
To start, anchor your thread with a small knot. Starting from the back of the fabric, bring the needle up, one stitch length from the start of your stitch line. Then, bring the needle back down at the start of the stitch line. This creates the first stitch.
Keep bringing the needle up one stitch length away from the previous stitch, and back down so it meets the stitch before. When you’ve reached the end of your stitch line, secure your thread on the back of the work and trim away excess thread.
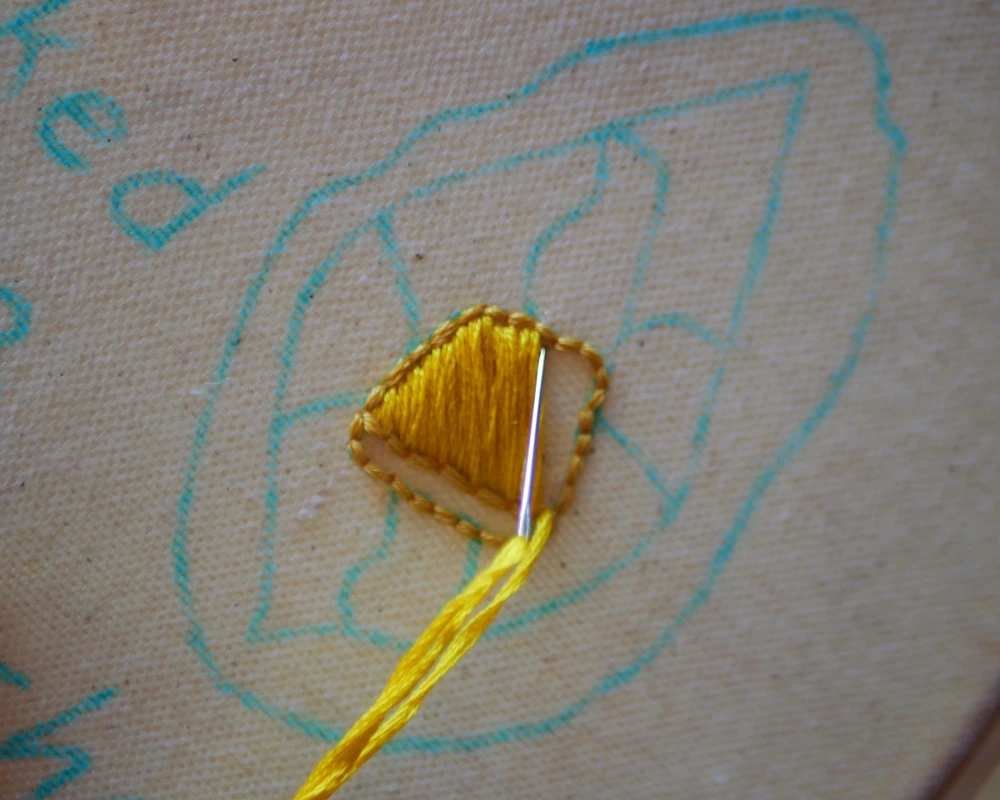
Satin Stitch

Another foundational embroidery stitch, satin stitch is a common way to fill in shapes. You’ll want to have an outline to follow for this stitch.
With a knotted thread, start at one side of the shape you want to fill and bring the needle up from the back. Then, bring the needle down, directly across from the first point, at the other side of the shape. This makes the first stitch.
Bring the thread up right next to the first point. Then, bring the needle back down right next to the second point to form the second stitch. The goal is to fill in the whole space, so you want your stitches right next to each other.
Keep working densely spaced stitches until the shape is completely filled. The stitches should look about the same on the front and the back of the work.
Don’t forget to secure the thread at the end of your stitches.
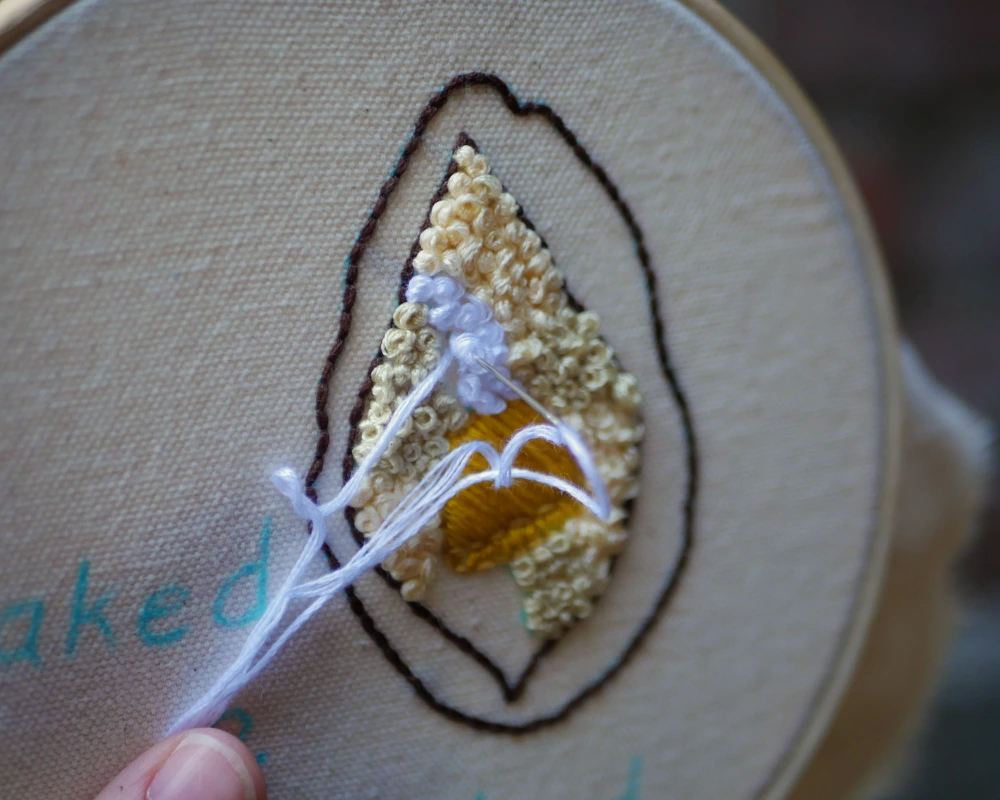
French Knot

The final stitch used in this pattern is the French knot. This fun little stitch adds a nice texture to any embroidery piece.
Bring your knotted thread up from behind the fabric, where you want your French knot to be, and pull the thread through.
Place your needle near where the thread comes through the fabric, and wrap the thread coming out of the fabric around the needle two or three times. The more times you wrap the thread, the bigger your French knot will be.
Gently pull on the thread, so the wraps are close to the needle, but not so tight the needle can’t move through the loops.
Push the needle through to the back of the fabric at the same point the needle came up, while keeping gentle tension on the thread. This creates one knot.
Secure your thread on the back of the fabric when you’ve completed all of your French knots.
Stitching the Pattern
Get Your Fabric Ready
Start by tracing the pattern onto the 9 inch by 9 inch fabric with whatever marking tool you want to use.
If you don’t want your drawing to show at all in the final project, you can use heat erasable or water-soluble ink pens. Personally, I like to use water-soluble ink. When I’m done stitching, I just get the fabric wet and all the markings instantly disappear. If you use a pen or pencil, be sure to cover all the markings with your stitches.
Having a light behind the paper and fabric makes it much easier to work with. You can use a window on a bright day, or a light on your phone or tablet. There are even backlight apps available.
Once your pattern is ready to go, place the fabric into the embroidery hoop.
Start by laying the fabric over the smaller hoop (the one without the screw). Then, place the outer ring over the fabric, so the fabric is pinched between the two rings of the hoop. To tension the fabric, alternate between gently pulling on the fabric edges, and tightening the screw of the hoop. You want the fabric to be taught like a drum.
Now you’re ready to get stitching!
Authentically Chaotic – Free Embroidery Pattern PDF
1. Butter Outline
- Color: 1 Dark Yellow
- Strands: 6
- Stitch: Back Stitch
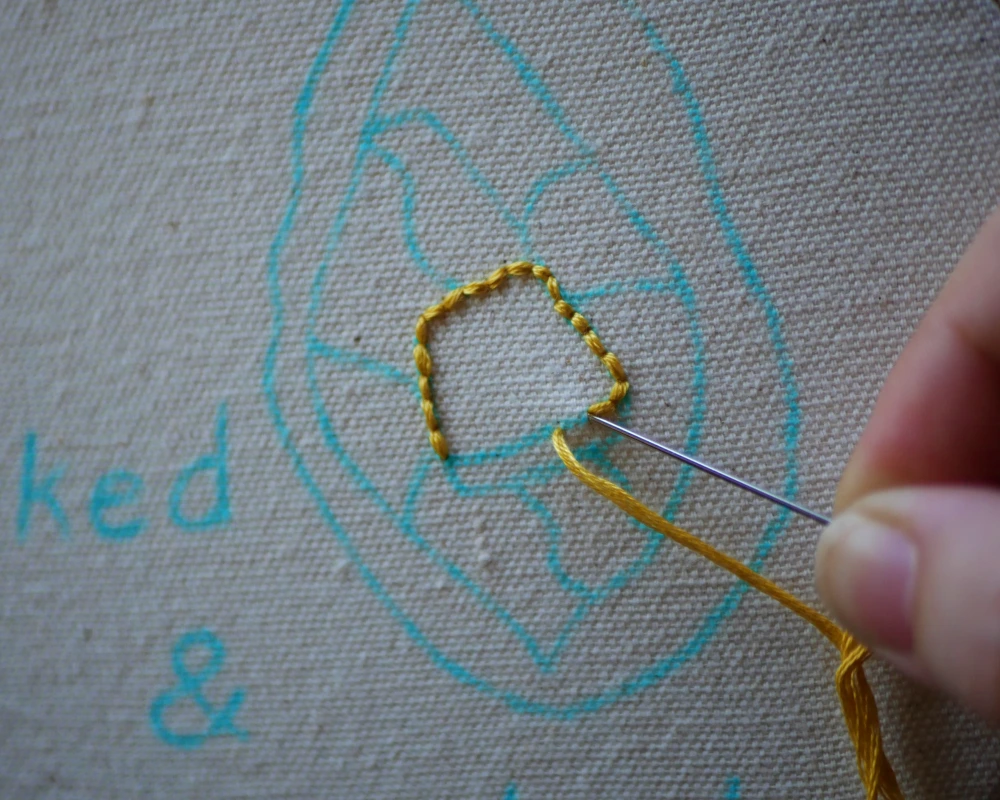
2. Butter
- Color: 2 Yellow
- Strands: 6
- Stitch: Satin Stitch
3. Potato Outline
- Color: 3 Dark Brown
- Strands: 6
- Stitch: Back Stitch
4. Potato Insides
- Colors: 4, 5 & 6
- Strands: 6
- Stitch: French Knot
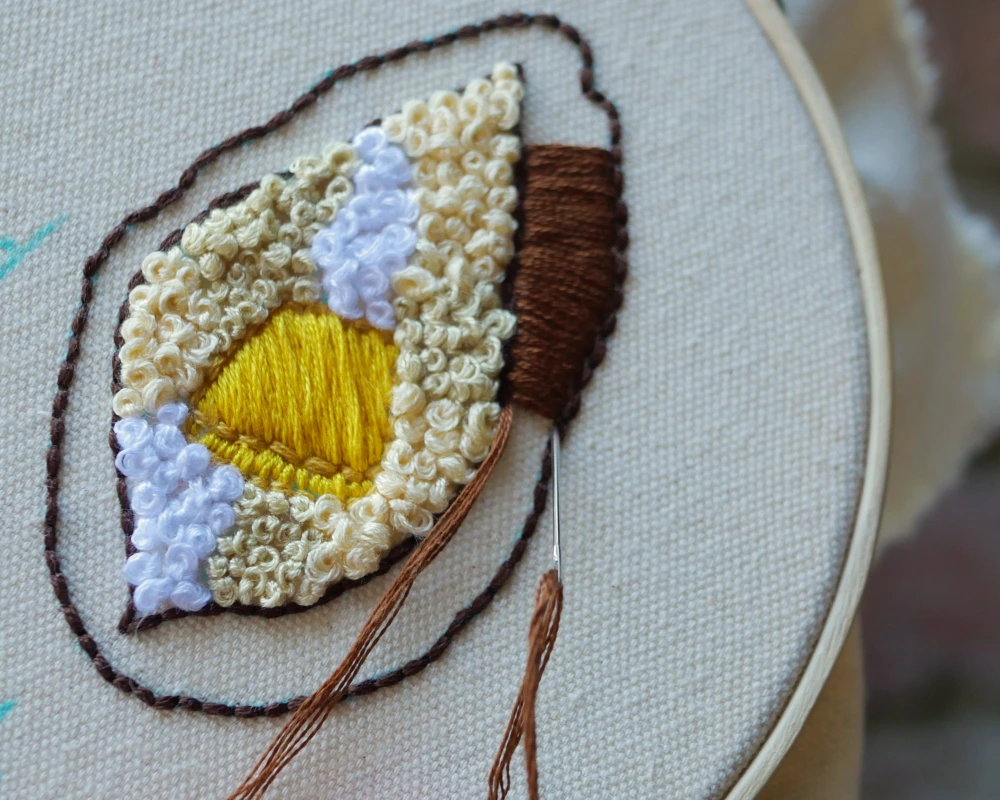
5. Potato Skin
- Color: 7 Brown
- Strands: 6
- Stitch: Satin Stitch
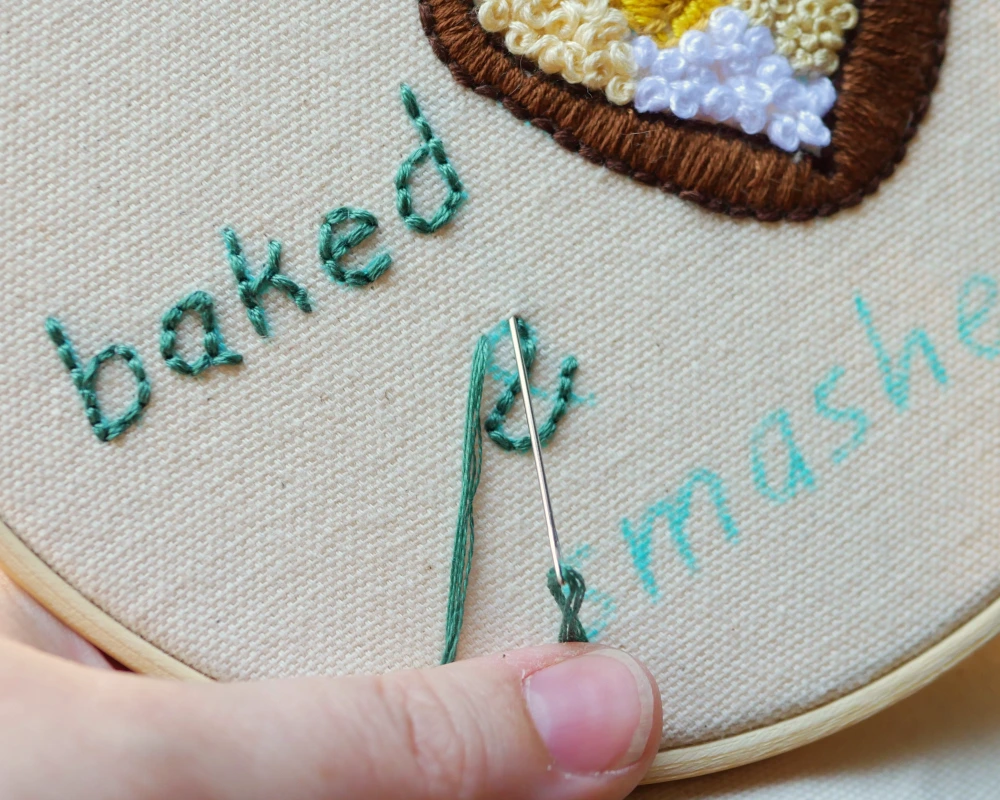
6. “Baked & Smashed”
- Color: 8 Teal
- Strands: 6
- Stitch: Back Stitch
Finishing Your Hoop
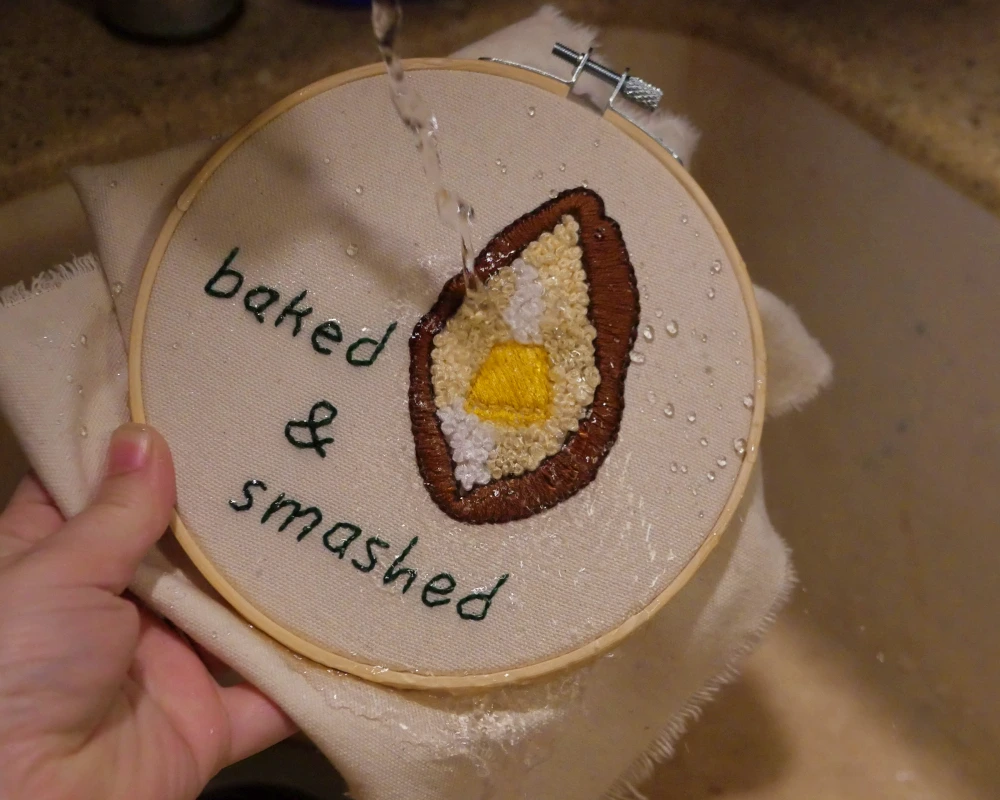
Now that you’re done stitching, it’s time to get your masterpiece ready to display or gift.
If you’ve used a removable ink to mark your pattern, now is the time to take it out of the hoop and either iron or wet the fabric to erase your markings, depending on what kind of ink you used.
To display your embroidery in the hoop, here are a couple of options for finishing the back of your work.
Back Finishing Option 1
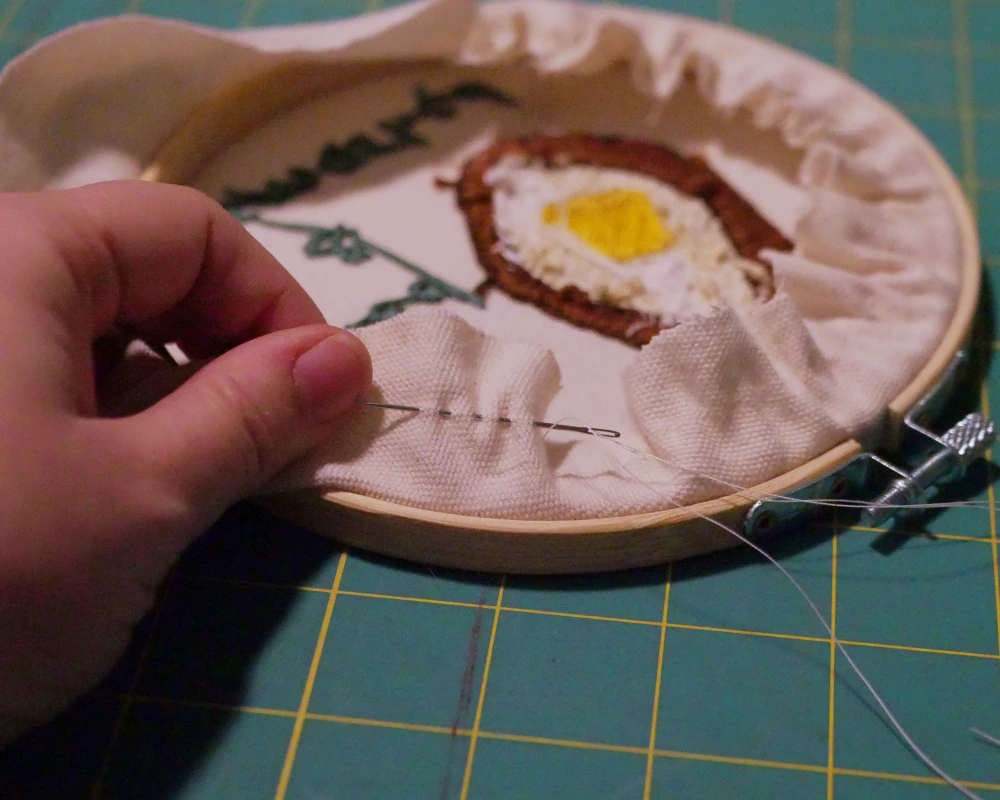
The easiest way to finish your embroidery is to put it back into the hoop and just trim away excess fabric, as close to the frame as possible. The stitches will still show on the back, but if it’s hanging on a wall, no one will see it anyway.
Back Finishing Option 2
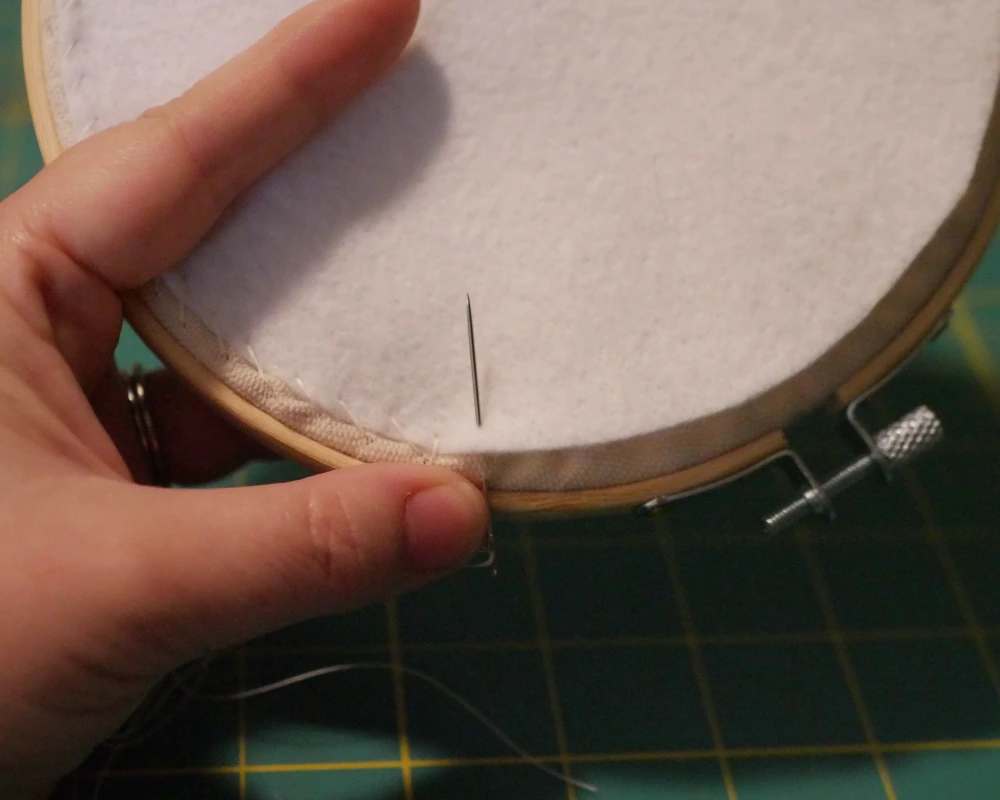
If you don’t want any stitches to show on the back of your hoop, you can cover the back with a circle of felt, the same size as the inner ring of your embroidery hoop.
After placing the fabric back into the hoop, trim away excess fabric, leaving about 1.5 inches of fabric around the edge of the hoop.
Then, use a quick running stitch around the edge of the fabric and pull it tight to draw the edges of fabric toward the middle of the hoop.
With the fabric tucked in, you can glue the felt circle to the back, or stitch it down with a whip stitch around the edge.
I hope you have fun stitching this pattern!
If you’re in the Tacoma area, be sure to check out my upcoming events and come say, “Hi!”
For more embroidery patterns and inspiration, click here.
Would you rather be baked or smashed? Let me know in the comments below!