How to Sew an Easy Viking Apron Dress – Free Tutorial
Whether you are looking for something to wear to a Renaissance Fair, a Halloween costume, or just something historically inspired to add to your wardrobe, this easy to sew Viking apron dress is a great layering piece!
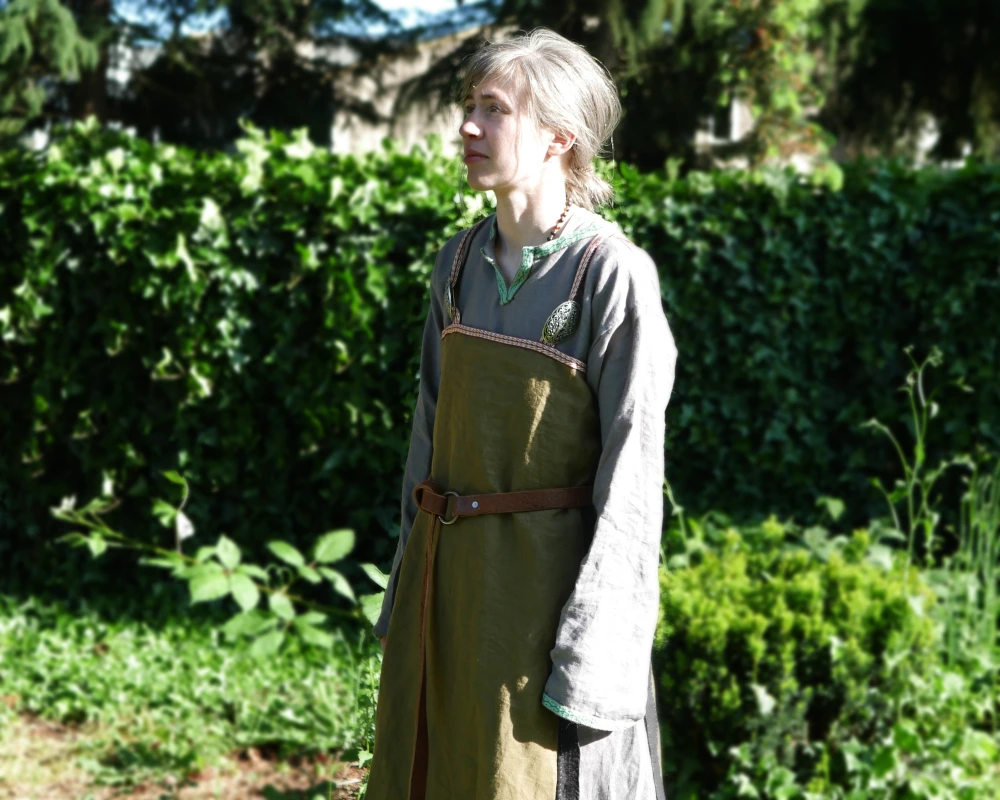
I love making historically inspired outfits, even if they aren’t for me. My latest sewing projects have actually been for my brother and sister in law. I recently finished this tunic for my brother, and I wanted his wife to have something to wear that coordinated with the tunic, but still stood out on it’s own.
This style of dress is incredibly easy to sew and makes a great project for beginners!
While this Viking apron dress is historically inspired, I make no claims to it’s historical accuracy. I would need to do a lot more research to claim any authenticity. This project is just for fun!
Disclaimer: Viking fashion and viking history are sadly being used by people who I do not agree with. If you are looking for a place that supports a hateful or discriminatory worldview, look elsewhere for your information. This space is not for you.
Jump Ahead
What To Do When Things Don’t Turn Out Quite Right
In the end, I love how this apron dress turned out, and I think my sister in law will look amazing in it. However, I ended up having a few issues as I was constructing this dress. I’ll walk you through all the problems I ran into, and how I solved them.
I hope that showing what happens when things don’t go according to plan inspires you to find your own creative solutions!
What You Need to Sew a Viking Apron Dress
Measurements
This Viking style dress is very simple and only requires a few measurements to create. The measurements you’ll need are as follows:
- Chest circumference
- Desired dress length from armpit to bottom hem
- Armpit to waist (or desired start of side split)
- Strap length over the shoulder so that the top hem line will fall around armpit height
- Length of the pin on the back of your broaches (if using)
This style of dress is so easy to sew to fit any body size or shape, and a few tweaks here or there.
Tools
Something to Iron With
The first and last thing you do in any sewing project (and nearly every step in between) is iron! While you can sew without ironing, it will make such a difference in your sewing experience and final project. If you are going to be sewing, you’re really going to be ironing.
Something To Measure With
You’ll need something to measure with to sew any garment. You’ll want a flexible measuring tape to take body measurements. To measure your fabric, you can use a flexible measuring tape, but it might be easier to use a solid ruler or yard stick.
Something To Cut With
To get clean cuts in your fabric, you will need a very sharp pair of scissors. If you can, it’s great to have a designated pair of fabric scissors that are big and sharp and only for cutting fabric.
Something To Hold Things Together
While you are getting your fabric ready to sew, you’ll want some straight pins or quilting clips to hold your fabric together before you can sew it.
Something To Sew With
You can sew this Viking style apron dress with just a needle and thread (which is what I did) or you can use a sewing machine, or even a combination of both! Use whatever you have and are comfortable with.
Materials
Fabric
You’ll need fabric to sew any outfit. How much fabric you need for this project depends on the size of the apron dress you want to make and the width of the fabric you are using ant to use. For most Viking style apron dresses, you should be able to make one with 1 or 2 yards of fabric, but double check what size pieces you need to cut out with the fabric you have before starting.
The type of fabric is up to you, but I recommend a woven fabric made out of natural fibers. I used linen to make this apron dress so it wouldn’t be too hot to wear in summer. I found a great deal on linen fabric at fabrics-store.com.
Decorative Trim
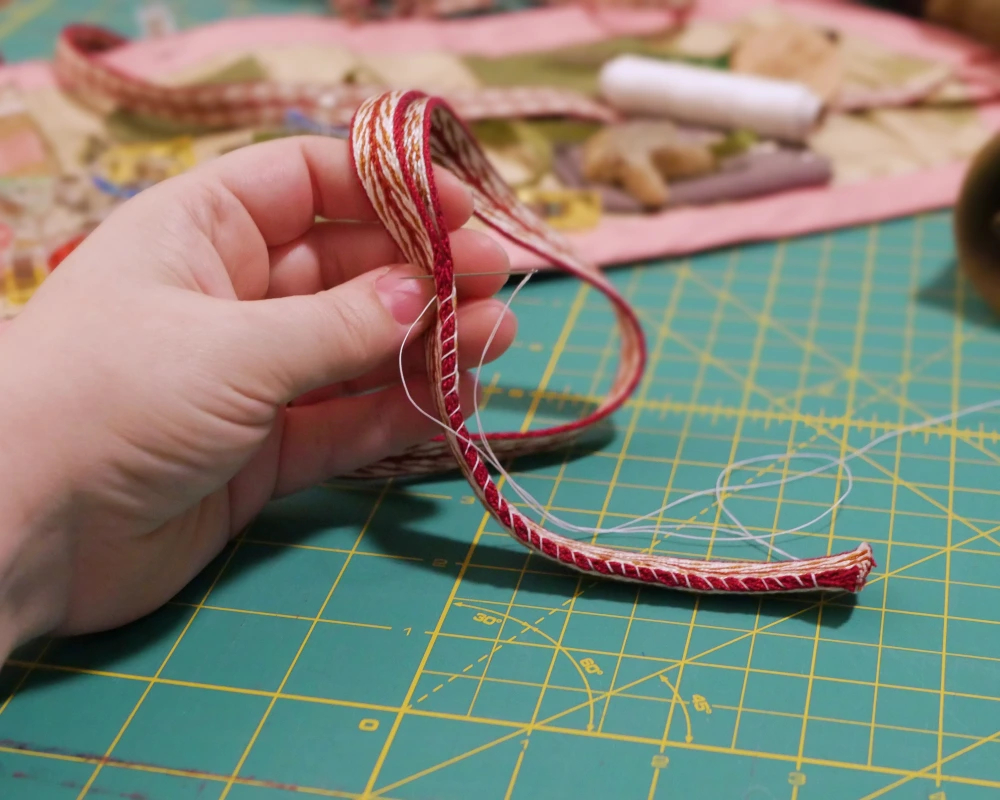
One detail that makes this Viking apron dress stand out is the trim around the neckline and for the shoulder straps. I used a tablet woven band that I wove myself. If you don’t want to weave your own, there are a ton trims and ribbons available for purchase.
You’ll want to use a trim that has straight edges and is about 0.25 -0.5 inch (0.5-1 cm) wide.
Fastening Pins or Buttons
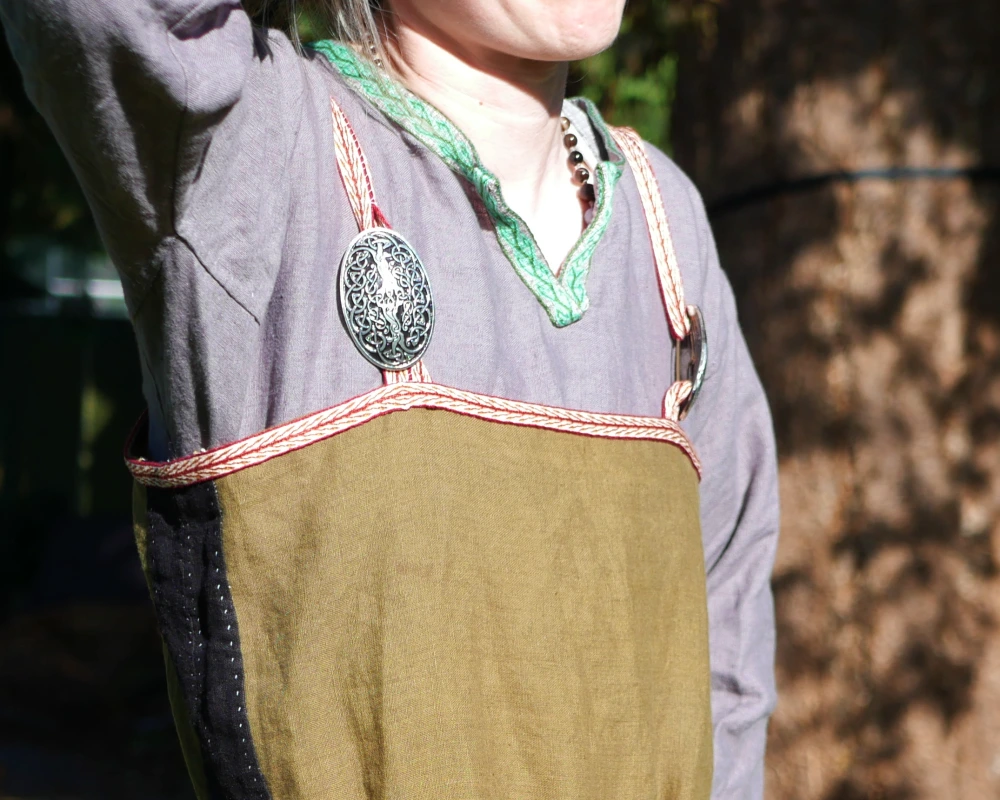
One of the most distinctive features of a Viking apron dress are the large broaches used to secure the shoulder straps. You can purchase these from several vendors online. I found beautiful options that were perfect for this outfit from Redwolf Ltd, and I would highly recommend them for your own Viking apron dress.
Another option would be a pair of large buttons that can serve a similar function.
Construction
Dress Design
The design of this Viking apron dress is incredibly simple. It is two large rectangles, partially joined at the top, with a set of straps over the shoulders. It doesn’t get much easier than that!
To make straps that clasp at the front with either broaches or buttons (like a pair of overalls), you will need to make four loops of either trim or fabric. Making loops instead of straight pieces gives you a place to connect the front and the back of the straps. The front has two short loops, and the back has two long loops that meet in the front.
Cutting it Out
Body Pieces
You’ll need to cut out two rectangles of fabric, using a few of the measurements from above.
The width of the rectangles will be the chest circumference (A), divided by 2, plus 1 in (3 cm) for seam allowance.
Make sure you are using the largest part of your chest to make sure it will fit and that you can get it on and off over your shoulders.
The length of your Viking apron dress is up to you! You’ll want to use the measurement from under your armpit to however long you want the dress to fall (B). Add 1 in (3 cm) to this measurement for seam allowance.
Cut out two rectangles of fabric using these measurements.
Shoulder Straps
How you cut out your shoulder straps will vary depending on if you are using broaches or buttons. Follow the directions ahead that match your plan.
Straps With Broaches
For the small front loops, cut two pieces of trim 4 in (10 cm) long.
To cut the longer back loops, start with the total strap length measurement (D) and subtract the length of the pin of your broach (E). Then subtract another 1.5 in (4 cm). This gives you the length of back strap you need.
Double this number, and add 1 in (3 cm) for seam allowance. Cut out two pieces of trim to this length.
Trim Measurement = ((Strap Length (D) – Broach Pin Length (E) – 1.5 in) X 2) + 1 in
Straps With Buttons
If you want to use buttons, you’ll need to measure your shoulder straps a bit differently.
The front loops will be the same, two pieces of trim 4 in (10 cm) long.
To get the measurement for the longer loops, start with the total strap length measurement (D) and subtract 0.5 in (1 cm).
Double this number to get the length for your two long shoulder straps.
Trim Measurement = (Strap Length (D) – 0.5 in (1 cm)) X 2
Neckline Trim
The final piece you will need is a piece of trim that can go all the way around the top of your Viking apron dress. This should be a bit longer than your chest circumference (A). I like to wait to cut this to its final length until after I’ve sewn it to my garment, just to make sure I don’t end up cutting too short on accident.
This bit of trim not only makes the apron dress look amazing, but it will cover the raw edges of the shoulder straps, and the raw edges of the fabric.
Sewing Your Viking Apron Dress Together
Now that you have all of your pieces ready, it’s time to start sewing!
Side Seams
Starting with the two body pieces, line them up with right sides together. Leaving a 0.5 in (1 cm) seam allowance, sew a seam on each side of the dress, starting at the top of the dress and ending when it reaches your underarm to waist measurement (C). For hand sewing, I recommend a backstitch.
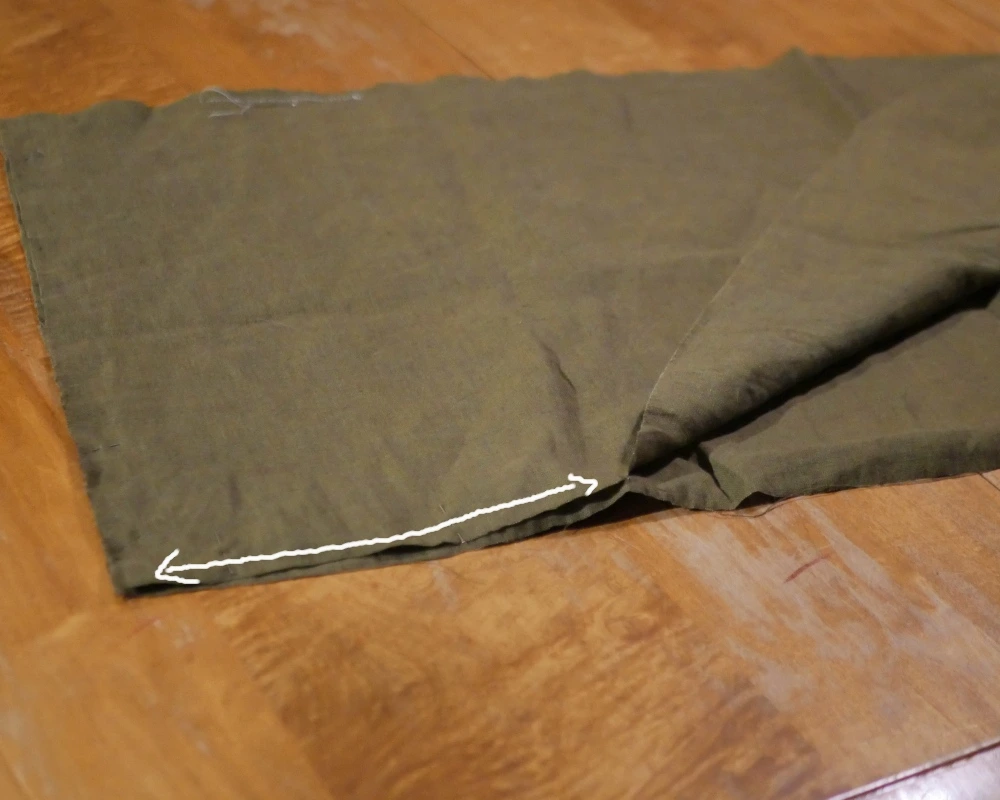
Then, press each of these seams open and continue folding the fabric down 0.5 in (1 cm) all the way down the open sides of the dress. Fold the seam allowance under and press again so you have a 0.25 in (0.5 cm) edge on along each side of the two side seams, and down the split sides of the dress.
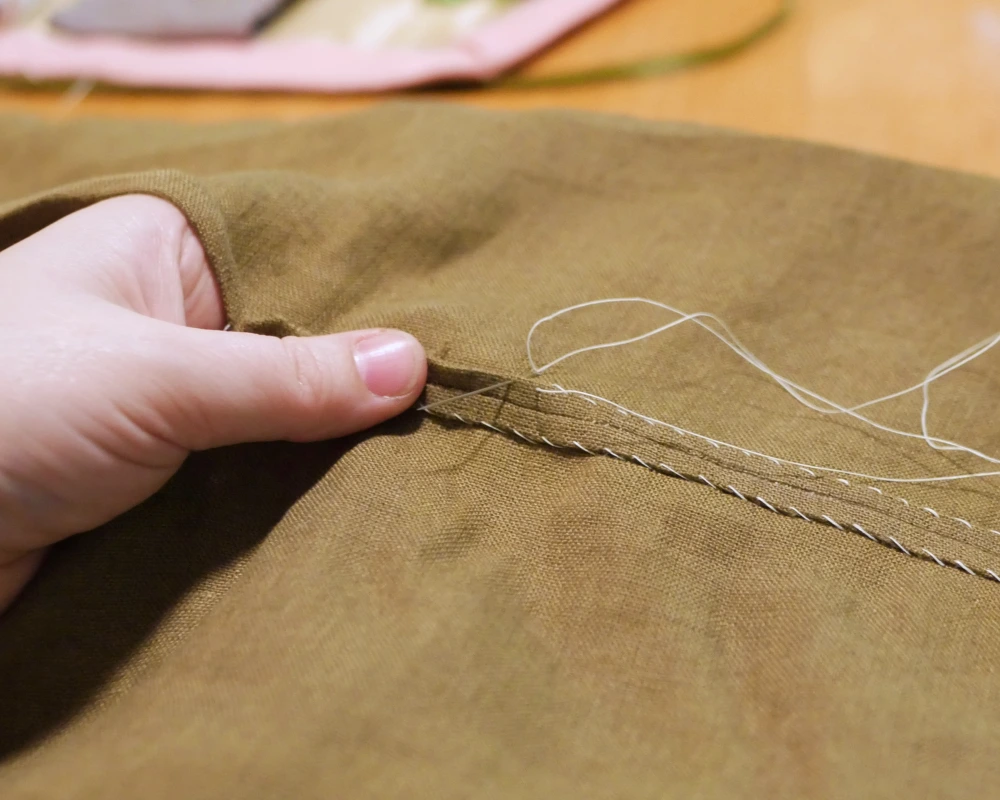
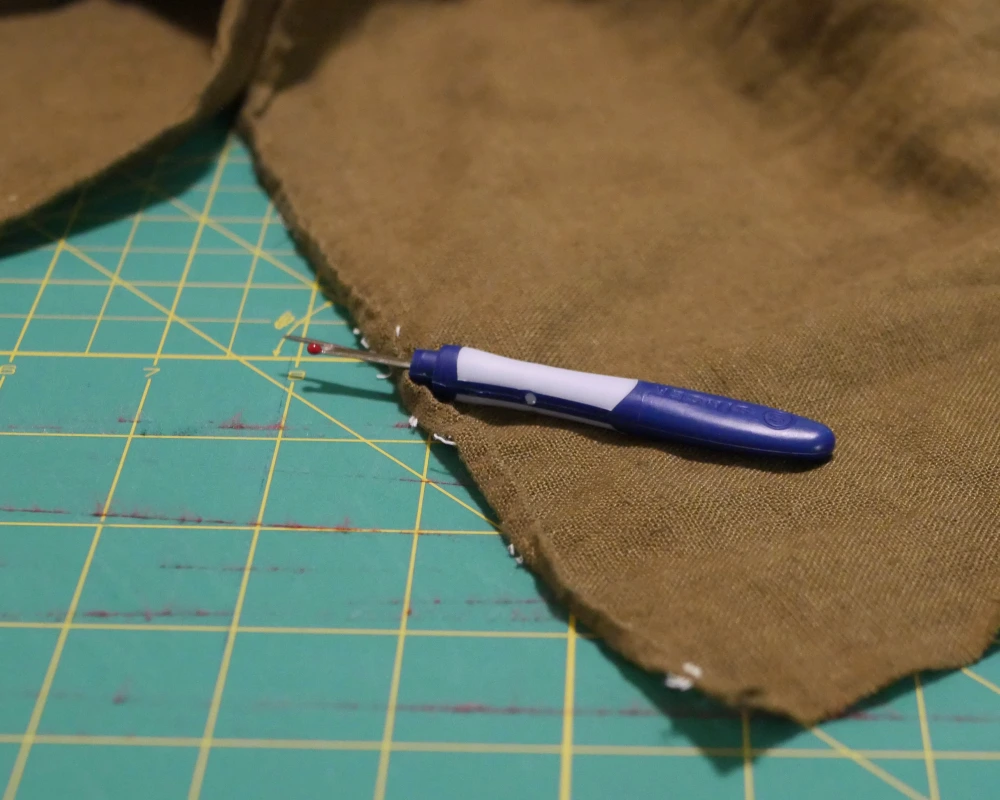
To finish these four raw edges, use a whip stitch to tack down the fabric, or run them through the sewing machine.
Mistakes Were Made
If you’re just here for the tutorial, feel free to skip this section. If you want to see a realistic depiction of what the creative process actually looks like, then keep reading.
When I had finished the side seams and their raw edges I noticed something didn’t seem quite right. My sister in law is quite slim, so I knew that her Viking apron dress would look different than if I had made one for myself. Even knowing that, the dress I was making looked to small for any adult to wear.
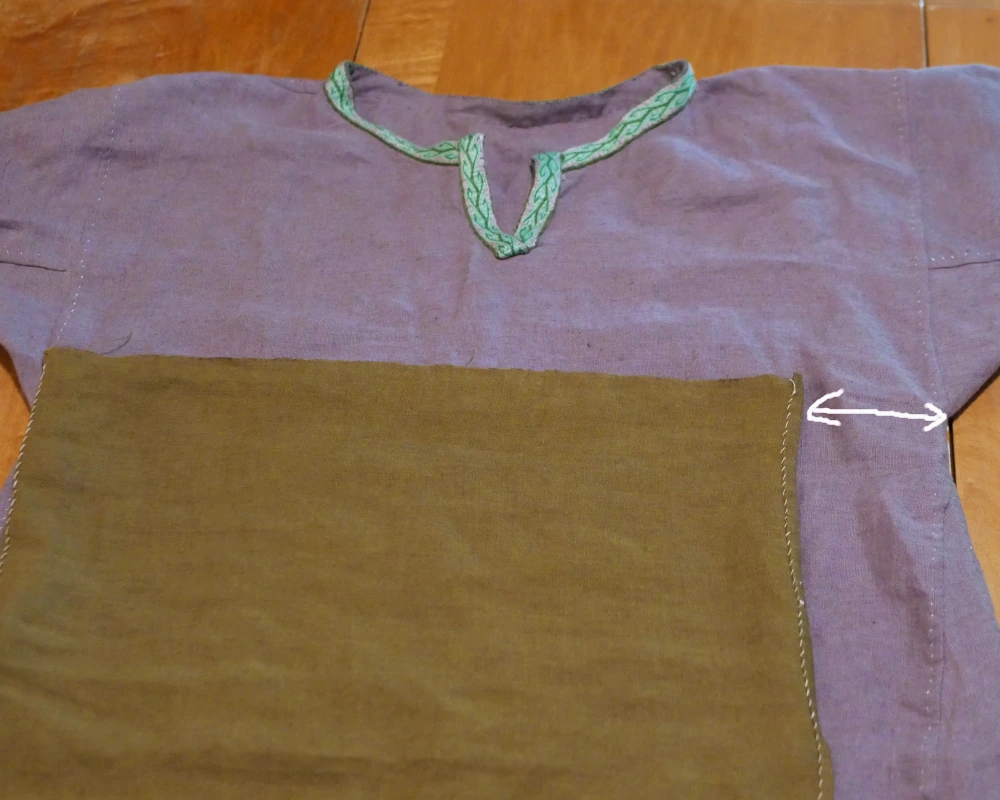
Sure enough, after checking the apron dress with the size of the under dress it was clear that I had done something wrong. I had cut my fabric in half the wrong way, so the dress was longer and more narrow than I had originally intended. She wouldn’t even be able to get the dress on!
This meant I had to rip out all of the sewing I had already done, and add some width to the sides. I didn’t have enough of the green fabric to do this, so I chose a bit of black linen from my stash to make interesting contrast on the sides.
In the end, I really like how this looks so it ended up being a happy accident! But it did add about a week of extra sewing.
Sewing the Shoulder Strap Loops
Before the shoulder straps can be attached to your Viking apron dress, each one needs to be sewn into a loop.
Starting with whichever strap you like, fold it in half, wrong sides together. On one edge of the folder trim, whip stitch along the edge from the loos ends up towards the folds, leaving about 0.5-1 (1-3 cm) open at the folded end. Then, open up the edge you didn’t sew like a book and lay it flat.
Repeat this process with all four shoulder straps.
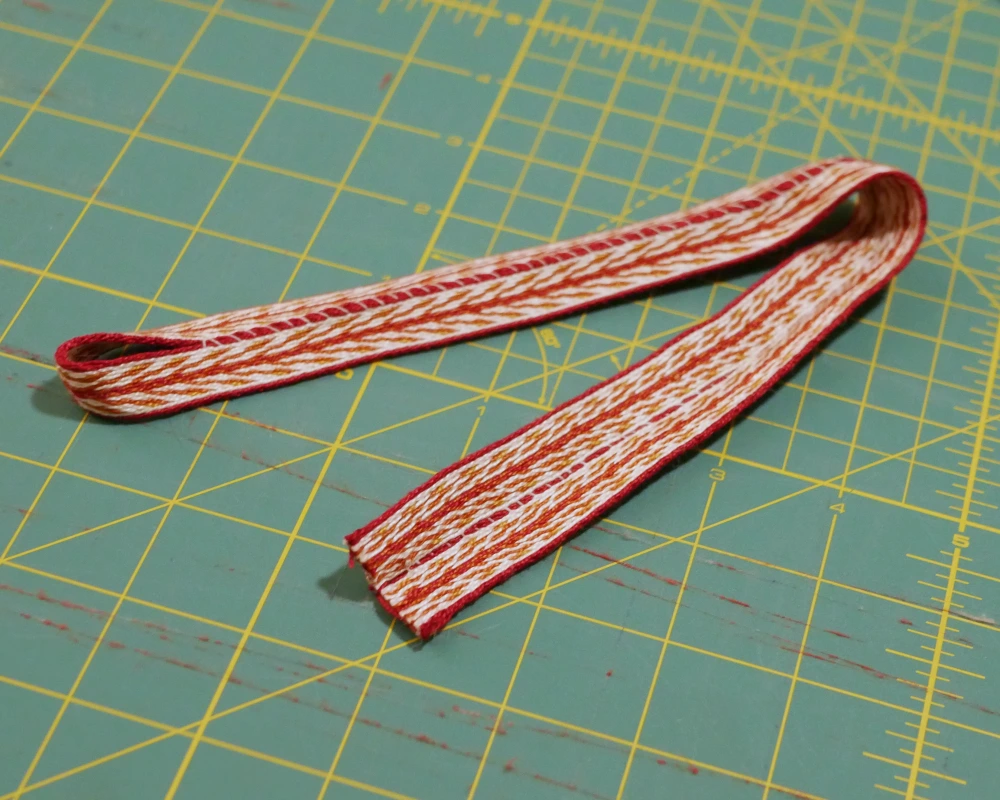
Note: If you are using buttons to fasten your straps, make sure the buttons you’re using fit through the loops at the end of your long shoulder straps.
Attaching the Shoulder Straps
Now that your shoulder straps are ready to go, you can sew them into to top of your apron dress.
First, fold over the top edge of your apron dress about 0.5 in (1 cm) to the right side of the dress and press it down. Make sure how ever far down you fold this is narrower than whatever trim you will be using.
Then, pin your four shoulder strap loops where you want them. The short loops should be in the front and the long loops in the back, with the doubled over ends meeting at the front of the dress.
You can put the unfinished dress on and mark where the straps should go to make placement easy. Just make sure you double check that the straps are evenly placed on each side.
Secure the shoulder straps with a few rows of stitching.
If you are using buttons, sew them to the top of the two front shoulder straps.
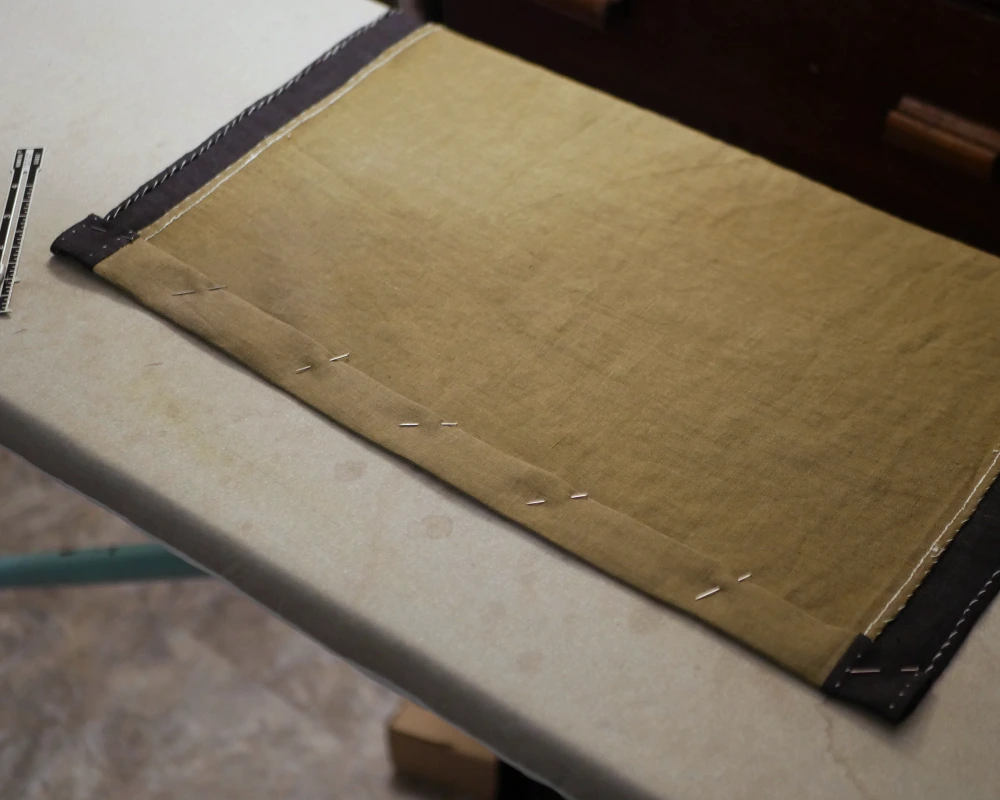
Finishing the top raw edge
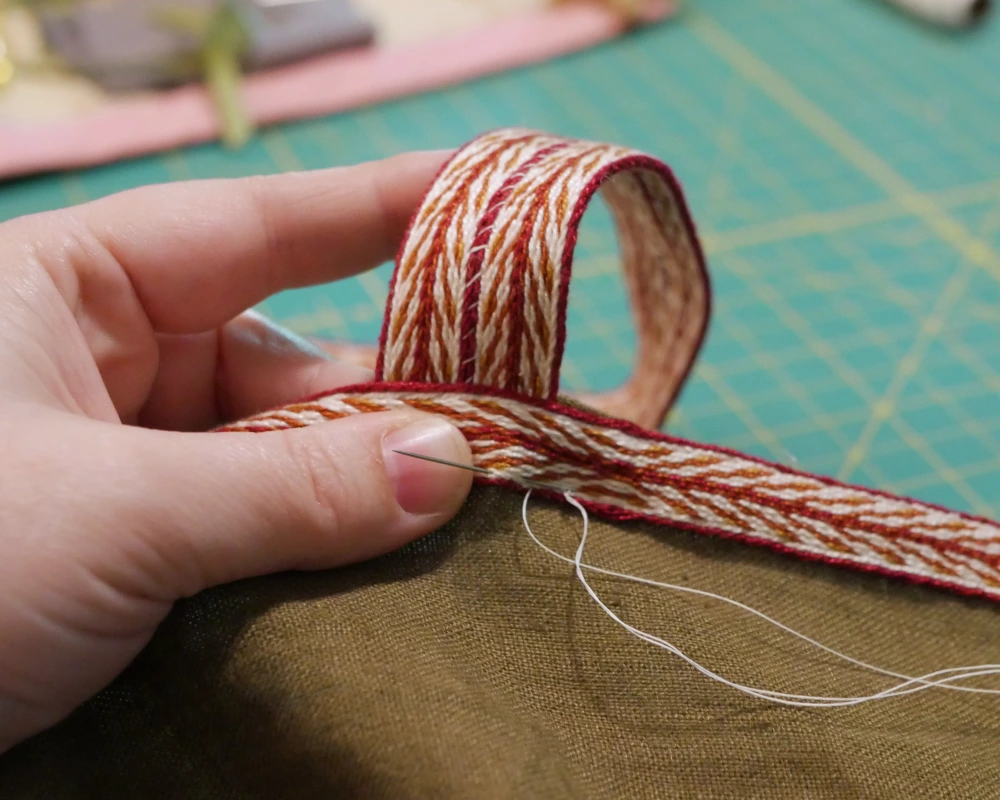
To finish the top raw edge, pin your remaining piece of trim around the top edge, tucking under the raw edges. Then sew down both edges of the trim either with a straight stitch by machine, or with a running stitch or whip stitch by hand.
Hemming
The final thing to do to finish your Viking apron dress is to hem the bottom. Simply fold over the bottom hem on the font and back twice, towards the back, and sew down with a whip stitch by hand, or by machine. You can make the hem bigger or smaller depending on how long you want your dress to be.
And that’s it! Your Viking apron dress is ready to wear!
Finishing the Look
This Viking apron dress can be styled any number of ways. For my sister in law, I made a tunic style under dress, using the same methods as the tunic I made for my brother, only making the skirt and sleeves longer.
A long leather or tablet woven belt is also a great addition.

I hope you get a chance to sew a Viking apron dress, and if you do, be sure to let me know how you styled it!
If you want to see more sewing tutorials, click here.
Where would you wear a Viking apron dress? Let me know in the comments below!